During a storm, stormwater drainage system runs the water off of your roofs, driveways, and other big surfaces. Stormwater drains, such as rainwater pits and drainage pipes, aid in the mitigation of the negative impacts of excessive water. Stormwater pits retain the excess water until it drains into associated drainage pipes in the council’s main system, preventing floods in a specific area.
It’s a legal necessity to acquire the council’s approval first because new stormwater drains connect to the main system. Your local government may send an inspector to your property to assess its suitability, and you might be obliged to pay a fee.
To ensure the proper installation of stormwater drains, it is important to hire an experienced licenced stormwater contractor.
Preparing the Pipelines and The Pit For Casting
As a safety precaution, it is important to ensure that the pipes are of high quality. Before lifting and lowering the pre-cast stormwater pit and drainage pipes into the excavated area, it is important to have them inspected for any damage or unreported materials.
- The number of pipe outlets a pre-cast pit should have and the provisions for connecting them;
- The potential and amount of pipe expansion and contraction owing to climate; and the pipe class
- Examination of the following factors when preparing the pre-cast pit and drainage pipes:
- Rainwater pits with plastic bases that are light in weight
- Stormwater pits with polyproline bases that are built to last
- Top filter lids made of plastic or aluminium
- Filtering devices such as leaf guards and other similar devices
It is recommended to use pre-cast stormwater pits (i.e. constructed before installation). They are built from recycled plastic or pre-cast concrete. The following are the most common pits and pit products that should be used:
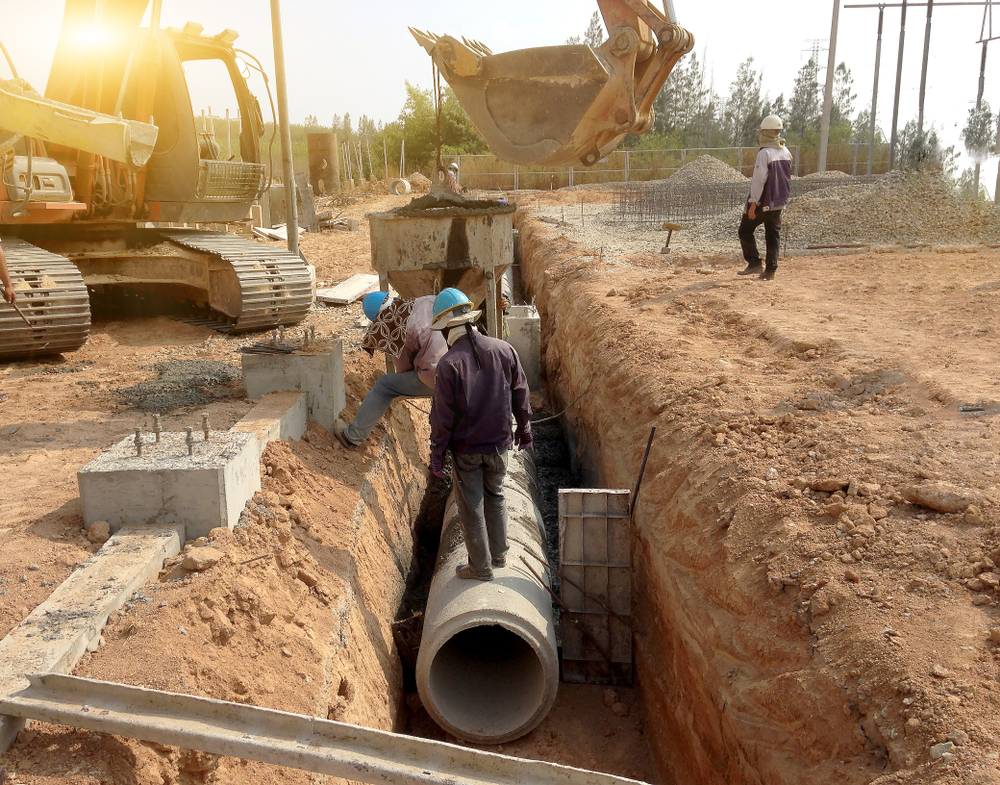
The Excavation Work
It is recommended to inspect the proposed stormwater drainage system site for resilience and robustness before excavating. After that, the trenches should be dug for the pipes and the stormwater pit hole.
The trenches are narrowed down to a practical level, while keeping enough space to conduct other work on-site, such as jointing and compaction. It is also necessary to consider the stability of the trench. Trenches that are kept wider tends to be more stable than those that are narrow. It is important to dig a large enough hole to allow for pipe expansion and contraction owing to changing weather conditions. The trench should be dug deep enough to prevent water from infiltrating and causing the pipes to float, but shallow enough to enable the pipes to support the weight of the ground above them. The pipe should then be placed in a smaller trench dug within the larger trench by your stormwater contractor.
Connecting the drainage pipes to the lowered pre-cast pit
The pipes should be secured enough for the pre-cast pit to sit firmly enough to prevent floating in the event that water infiltrates the trench. Because the pipes can only be joined while straight, it is necessary to bend them with a padded bending assist.
If a trench becomes unstable, we can reinforce it with timber trench walls and steel rods, as well as adding enough additional support for slopes of 20% or more.
Backfill and Install Grate After Applying Sealant/grout.
The trenches should then be replenished, compressed, and levelled with sealant and grout and allow to dry. Afterwards, install the grate atop the stormwater drainage system.
The backfilling work should consist of underlaying and overlaying works, accounting for pipe expansion and contraction due to changing climates. The best foundation material is sand, but crushed rock or gravel is also a viable option.